
Monday, November 30, 2009
Cotton Pickin' Information
Running Totals and Lists
As I build I'm keeping a list (on the left) of what I purchase and what tools I use. Building a layout does require a lot of tools to do the job FAST, but not always to just to the job.
I also try to keep the cost down when possible. Masonite and Luan are cheap. The loco was on the high side, but when your layout only needs one and the layout is small, I believe that a high end loco with DCC and sound is a necessity. Blowing the whistle and ringing the bell is as much a part of operations as anything.
Let me know if you have any questions...
30 Minutes a Day
My new policy is to go to the basement for no less than 30 minutes a day. I've found that if I don't make model trains a priority, I will never have anything finished. So from now on I will go to the basement each day. You can get a lot of work done in this fashion and all the modelers that I know that are high producers go play every day. Besides, it makes me more tolerable to be around.
Tonight, we fix the inner radius slat.
 My first chore is to take the clamps off of yesterday's project and check the work. Very nice! Now, using a hand saw I'll cut off the "tail".
 I cut a 2x4 square of Masonite 1/8" thick into 3" strips. I put glue on one of the side plates and countersunk two (not three) holes into the Masonite. Using two 1 1/4" drywall screws, I anchored the slat. Then I applied wood glue to the base and the other slats and moved the Masonite into place. It bends perfectly to the form! I drill and anchor the other end and then clamp the slat to the base to give a good contact for gluing.
 Using the hand saw, I trim off the tail and will let it dry overnight.
Tomorrow I'll cut out the top plate and glue it to the waffle base that we just made in order to complete the first Section. Now that the glue has dried it is amazingly strong and light weight.
Tonight, we fix the inner radius slat.
 My first chore is to take the clamps off of yesterday's project and check the work. Very nice! Now, using a hand saw I'll cut off the "tail".
 I cut a 2x4 square of Masonite 1/8" thick into 3" strips. I put glue on one of the side plates and countersunk two (not three) holes into the Masonite. Using two 1 1/4" drywall screws, I anchored the slat. Then I applied wood glue to the base and the other slats and moved the Masonite into place. It bends perfectly to the form! I drill and anchor the other end and then clamp the slat to the base to give a good contact for gluing.
 Using the hand saw, I trim off the tail and will let it dry overnight.
 Tomorrow I'll cut out the top plate and glue it to the waffle base that we just made in order to complete the first Section. Now that the glue has dried it is amazingly strong and light weight.
Shopping Trip
I'm going to replace the inside radius slat with 1/8" Masonite. That will flex enough and still give strength. Also bought a stick of corner round and some wood glue.
Sunday, November 29, 2009
Rolling Stock Aquisition Roster
Ok, now that we know what types of rolling stock we need, let's build and acquisition register. This way we will know what cars we need to go look for to complete the railroad. I've already procured one of them, the Central of Georgia box car. Now I'll go peruse my collection to see which ones I already have in stock. The rest I'll search for over the next few months as I build the railroad.
 Click on spreadsheet to enlarge.
Rolling Stock Requirements
Looks like we are going to need a maximum of 21 cars to run the railroad. Usually my calculation is a little high and I use it as the maximum number. With an interchange we can float cars in and out of circulation so you can have even more than 21, but for right now we will have trouble with showing 21 on the layout. It will be just about the full stage.

Click on the table to enlarge.
The table lists all the industries on the layout and what type of rolling stock it might receive or ship. Some industries require two cars sitting on the spur, one loading and one unloading. Boxcars are showing the highest density at 33% of the supply, so we'll have quite a few of these.
As a rule of thumb I like 40% of the rolling stock to be home road branded. This means I'll have an abundance of cars labeled for the Southern Railroad. Next, I'll have 25% branded as local railroads that interchange or are within close proximity of the railroad. So you will expect to see some L&N, TAG, ACL, Seaboard, CofG and other southern roads. A small 2% will be MOW cars. That leaves 33% to be non-southeastern roads. Here we'll add a Pensy, some Union Pacific and a few others. This will give us a nice and believable mix of traffic.
We're open for ideas and corrections, so if you see us headed down a dark path, enlighten us with a comment, below!
Industrial Operating Plan
The Dixie Central is a busy railroad. While it is only moving small loads, the complexity of the shipping should keep any one man show busy with the car cards. Click on the operating plan to enlarge.
 As you can see from the map there are two high volume "industries" which are the Tybee Warf and the Southern/Louisville & Nashville Interchange. Another busy "industry" is the Cotton Team Track. What I like about interchanges, warves and team tracks is that there is virtually no limit to their cargo type. They can ship and recieve most anything.
In this case the Cotton Team Track is the farmer's supply line. Farm Machinery, seed, feed and supplies can all arrive by LCL (Less than Car Load) from the warf or the interchange. Likewise, every business needs parts and supplies, so the warf and interchange can provide traffic to everyone.
The main "business" of the railroad is moving cotton. While the business chain of cotton is present:
There is an abundance of alternate routes as well. Raw cotton can go to the warf directly, or the interchange. The Gin can ship straight out to these locations as well, by passing the Mill which might not be paying top dollar today.
This highly integrated supply chain model allows for traffic to move in and among all the players on the layout making for an interesting operating model.
What is the Southern Railway Supply Office? Why the have a business in keeping the train running. This business needs coal, sand lubricants, repair parts and supplies. It becomes an industry as well. It even ships an empty sand gondola back to the river sand company.
Next, we have to figure out how many rail cars we need and of what type. That takes a different kind of chart.
 As you can see from the map there are two high volume "industries" which are the Tybee Warf and the Southern/Louisville & Nashville Interchange. Another busy "industry" is the Cotton Team Track. What I like about interchanges, warves and team tracks is that there is virtually no limit to their cargo type. They can ship and recieve most anything.
 In this case the Cotton Team Track is the farmer's supply line. Farm Machinery, seed, feed and supplies can all arrive by LCL (Less than Car Load) from the warf or the interchange. Likewise, every business needs parts and supplies, so the warf and interchange can provide traffic to everyone.
The main "business" of the railroad is moving cotton. While the business chain of cotton is present:
Team Track to Gin to Knitting Mill to Warf or Interchange
There is an abundance of alternate routes as well. Raw cotton can go to the warf directly, or the interchange. The Gin can ship straight out to these locations as well, by passing the Mill which might not be paying top dollar today.
This highly integrated supply chain model allows for traffic to move in and among all the players on the layout making for an interesting operating model.
What is the Southern Railway Supply Office? Why the have a business in keeping the train running. This business needs coal, sand lubricants, repair parts and supplies. It becomes an industry as well. It even ships an empty sand gondola back to the river sand company.
Next, we have to figure out how many rail cars we need and of what type. That takes a different kind of chart.
Not as Easy as it Looks
The round waffle construction is not as easy as the square sections I've built before, that's for sure. I've got a lot of learning left on round sections. I've been corrected in that I've called these modules, but the module people say that since they only connect with each other in a certain way, this is a sectional layout. So they will be sections from now on.
 I cut out Section #3 with no issues. They get quicker as you go, but I've noticed that I've gotten a little sloppy. The cut outs aren't critical, but if you move the saw too fast you get an abundance of splintering. I'll try to slow down.

Here is Section #4 with the radii trimmed and ready to work on the cut outs. The pile of odd shaped cut outs on the floor worries me as I don't know what I'm going to do with them. I hate to waste wood.
 Here are all four sections in the round. I stood in the pit and I have PLENTY of room. That makes me feel good as I was a bit worried about it. Still a little worried about getting in and out of the hole. The layout is smaller than it seems on the drawing.
 Using a 1" x 3" plywood board cut to 29 1/2" I installed the first side plate. DO NOT USE PLYWOOD. This is a job for a real board. I had a lot of problems with the construction because of the plys splitting.
 I glued and screwed the board onto the section frame with 1 1/4" drywall screws, the holes pre-drilled and countersunk.

I decided to make a tool list for the blog. Here are a few items I'm using. You will need plenty of 6" C-clamps!

Section side plate #2 is now in place. These boards are heavy and the frame must be handled with care to keep from splinting the wood.

Using the table saw I ripped one 4' x 4' panel down to 3" strips. My saw is an older Delta saw and it is underpowered and very cheap. Waffle construction requires a lot of precision and I really need to use another saw. If I can't make this module work I may go over to Bob's and see if he'll help me with the cutting. I'm trying not to get any help since this is an A/P project layout, but if I don't have the saw or the money/space for a better one, then I'll have to get some assistance. Its not that I don't know how to cut wood!

I'm big on making gadgets to help me with my work. This little spacer is one luan board thickness (3/16") with a stop on the back. I'll use this for positioning the slats as I install them so they aren't too close to the edge.
 Here you can see the gauge in use.
 I cut three 29 1/2" slats and began to install them. Using ample glue each was place along the ray line and reinforced with small square blocks. I checked the 90 degree angle with a speed square.
 The blocks were just small scraps, but normally I use corner round for this. It has the advantage of being smaller and curved so that it adds less weight.
 My saw's inaccuracy shows in that I don't get 100% contact all along the slat. This is not good. I'm going to have to use more glue.
 Here are all the slats in place. The wavey-ness caused by the saw shows on the tops of the board. I'll keep working with this one and see how it goes, but I'll probably re-build it.
LESSON: IF IT IS NOT WORKING - THROW IT AWAY AND START OVER. IT IS BETTER TO DO THIS THAN TO PUT UP WITH SOMETHING YOU KNOW WILL DRIVE YOU CRAZY OVER THE LONG HAUL.
 Next I started installing the smaller cross slats. The CAD dimensions didn't come out exactly as planned, so each is having to be cut to order. Not sure how that happened.
 Here is Section #1 with all the interior slats. The glue is still wet and it is a bit flimsy.
 A close up of the inside radius.
 I cut a long 3" board out of an 8' sheet of luan. This will be the outer radius slat. The board is very flexible. I glued, countersunk and screwed one side in with three 1 1/4" drywall screws.
 Then I applied glue to the base all the way around the radius and on each of the slats. Using C-clamps I clamped the board down tight and glued/countersunk/screwed the other side to the board. This went very easy and made a beatiful curve! Looking great!
CRAP! I found out the hard way that luan will not easily curve to a 1.5' radius. I found this out by snapping the board in half and taking two splinters to my chin. BANG!
We'll stop here tonight until I can find a way to make the inner radius board. Ideas are welcome!
 I cut out Section #3 with no issues. They get quicker as you go, but I've noticed that I've gotten a little sloppy. The cut outs aren't critical, but if you move the saw too fast you get an abundance of splintering. I'll try to slow down.
Here is Section #4 with the radii trimmed and ready to work on the cut outs. The pile of odd shaped cut outs on the floor worries me as I don't know what I'm going to do with them. I hate to waste wood.
 Here are all four sections in the round. I stood in the pit and I have PLENTY of room. That makes me feel good as I was a bit worried about it. Still a little worried about getting in and out of the hole. The layout is smaller than it seems on the drawing.
 Using a 1" x 3" plywood board cut to 29 1/2" I installed the first side plate. DO NOT USE PLYWOOD. This is a job for a real board. I had a lot of problems with the construction because of the plys splitting.
 I glued and screwed the board onto the section frame with 1 1/4" drywall screws, the holes pre-drilled and countersunk.
I decided to make a tool list for the blog. Here are a few items I'm using. You will need plenty of 6" C-clamps!

Section side plate #2 is now in place. These boards are heavy and the frame must be handled with care to keep from splinting the wood.

Using the table saw I ripped one 4' x 4' panel down to 3" strips. My saw is an older Delta saw and it is underpowered and very cheap. Waffle construction requires a lot of precision and I really need to use another saw. If I can't make this module work I may go over to Bob's and see if he'll help me with the cutting. I'm trying not to get any help since this is an A/P project layout, but if I don't have the saw or the money/space for a better one, then I'll have to get some assistance. Its not that I don't know how to cut wood!

I'm big on making gadgets to help me with my work. This little spacer is one luan board thickness (3/16") with a stop on the back. I'll use this for positioning the slats as I install them so they aren't too close to the edge.
 Here you can see the gauge in use.
 I cut three 29 1/2" slats and began to install them. Using ample glue each was place along the ray line and reinforced with small square blocks. I checked the 90 degree angle with a speed square.
 The blocks were just small scraps, but normally I use corner round for this. It has the advantage of being smaller and curved so that it adds less weight.
 My saw's inaccuracy shows in that I don't get 100% contact all along the slat. This is not good. I'm going to have to use more glue.
 Here are all the slats in place. The wavey-ness caused by the saw shows on the tops of the board. I'll keep working with this one and see how it goes, but I'll probably re-build it.
 LESSON: IF IT IS NOT WORKING - THROW IT AWAY AND START OVER. IT IS BETTER TO DO THIS THAN TO PUT UP WITH SOMETHING YOU KNOW WILL DRIVE YOU CRAZY OVER THE LONG HAUL.
 Next I started installing the smaller cross slats. The CAD dimensions didn't come out exactly as planned, so each is having to be cut to order. Not sure how that happened.
 Here is Section #1 with all the interior slats. The glue is still wet and it is a bit flimsy.
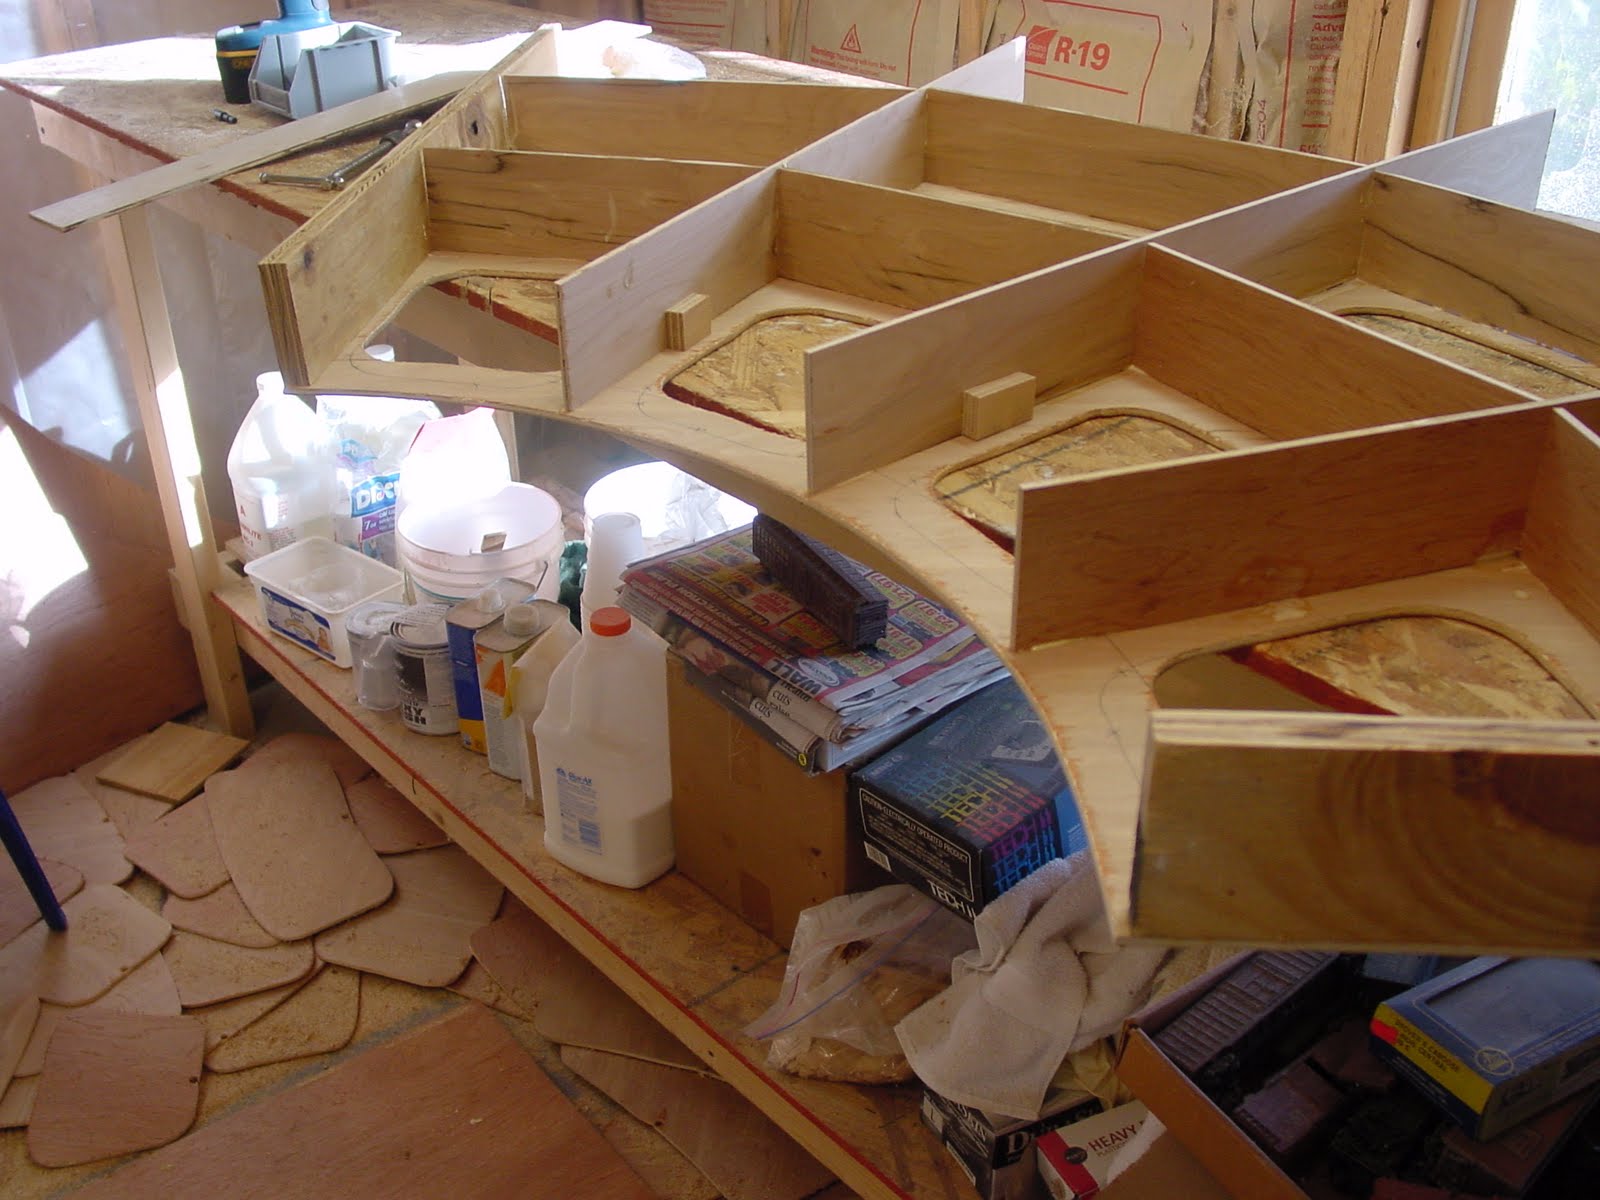 A close up of the inside radius.
 I cut a long 3" board out of an 8' sheet of luan. This will be the outer radius slat. The board is very flexible. I glued, countersunk and screwed one side in with three 1 1/4" drywall screws.
 Then I applied glue to the base all the way around the radius and on each of the slats. Using C-clamps I clamped the board down tight and glued/countersunk/screwed the other side to the board. This went very easy and made a beatiful curve! Looking great!CRAP! I found out the hard way that luan will not easily curve to a 1.5' radius. I found this out by snapping the board in half and taking two splinters to my chin. BANG!
 We'll stop here tonight until I can find a way to make the inner radius board. Ideas are welcome!
Oceanside Scenery
Here is a very good article on making coastline water.
http://www.modelersguild.com/e-magazine/paint-booth/paint/269-creating-a-coastline
http://www.modelersguild.com/e-magazine/paint-booth/paint/269-creating-a-coastline
Saturday, November 28, 2009
Scale Track
I forgot to add the scale track for the cotton gin. Not sure where to put it, but it will be important.
Friday, November 27, 2009
Chatting about the Dixie Central
Thanks for all the great feedback, folks. Keep it coming and post comments!
One great comment was brought up today. Where am I going to store a soda or coffee while running the railroad. Those that know me know that I always have a glass of icewater or Coca Cola going all the time. I have no idea where to put anything in a 3 foot hole.
My thought is that the mountside area is going to need to be tall and hollow. I might have to make this out of hydrocal so that I can use the hollow space for drinks, throttles, etc. It either that or a hidden place in the scenery will need to be installed.
I'm still not sure if I can sit on a rotating stool in the middle. Only time will tell.
NOBODY has made a comment on the track plan, so I'm thinking its good to go. Scratch that. Bob suggested that I get the siding for the knitting mill moved, so I'm still pondering that.
Join us on Yahoo's Egroup for the Dixie Central! http://groups.yahoo.com/group/dixiecentral/?yguid=307907763
Thursday, November 26, 2009
Module Legs
Frankly I don't like any module layout leg design I've ever seen. I've tried them all. None of them are excellent. I'm going to go back to the tubular legs again.

I ordered this set from Harbor Freight. Sometimes I get lucky with them, other times I don't. Either way if they aren't what I want I just take them back. These cost $44.97 for two sets, 4 leg systems. I'll mount one on each module. Northern Tool & Equipment had a much more sturdy looking pair, but I'm not going to put much weight at all on them so I thought it was overkill.
These legs are made with 1 1/4" steel tubing. I'll add length to them by adding more tubing and welding it in place. Tried bolting these once before, but they never get tight enough and wobble.
Wednesday, November 25, 2009
Get a Big Print!
I ordered a poster sized print out of the layout drawing for the basement. My buddy Bob Wheeler did this when we were building his ONR layout and it is a big help! You can see it from anywhere in the room. Cost is $22.25, but worth every penny. I'll pick it up Friday.
Construction On Base of Modules
Ok. Let's get started! The first thing we need to build are the waffle module bases. These are 3/16" Luan plywood webs essentially.
WARNING: Luan generates splinters that are painful and can cause infections. They are very sharp and are quite painful when they get in your eye. Do not take this lightly. Please wear safety glasses and gloves when cutting Luan.
We'll start with the cutting diagram below. Click on the diagram to enlarge.
 The original plan was to have five "wedges" instead of four. However, when I went down to the basement to plot them out I found that it was a bit more difficult to do than I first thought while drawing it on the CAD system. My brilliant wife challenged my five section thinking and asked my why I had not used four which would allow for an easier mark up. When I looked at the drawing and tested her theory, I figured that the loss of one more support in the module would not affect its strength and modified the drawings per her suggestion. Thanks honey! The new design is much easier and can be laid out without bisecting arcs or fancy geometry.

This morning I had Home Depot rip 5 sheets of 3/16" Luan for me. They are nice and square.

Naturally, the work desk is a mess and has to be cleaned up before I start. I left the panels on the floor to flatten out and I'll use my 290 lb bulk to flatten them further as I stand on them. Fat has its advantage. Usually at the all-you-can-eat restaurant. Nobody gets in my way!
 I was going to draw a lot of radii, so I figured I'd invest a little time in making a radius tool for the project. None of my other ones were over 4' in length.
 I clearly label the radius tool because it is a scrap piece of wood and will get used or thrown out if it is not clearly marked. I'll keep it by the other measuring devices in the shop.
 Instead of nails like many people use, I use a screw for the pivot point. It locks the tool in place and it won't move until you want to take it out.
 Carefully I draw all the radii on the panel using a gel pen. I couldn't find a pencil and the dark in shows up better on the Luan.
 Each radii is no on the panel. The main centerlines I go over twice so they are darker. Thought about using another pen color.
 Next I marked the 20" dimension for the section line.
 One on each side.
 Here you can see the section lines and their 1" parellel line that goes on either side. The parallel line will be used to draw the "holes".

Throughout the evening I was visited by Quality Control She used her flashlight to show my mistakes to me. Just like her mother....
 Here you can see the lines
 Once all the tangent lines were drawn, I used a roll of masking tape to draw the filets in. These filets are necessary for adding strength to the module and should not be left out. I would not use the masking tape roll again as it is a 1.5" radius. A 2" radius (now in the drawing above) is much easier to cut with a sabre saw.
 Here you can see the filets drawn in the "holes" or "cut out sections"
 Looking good! Let's make some sawdust. Safety glasses, everyone!
 The panel is larger than the work table and quite flimsy. I will use a variety of clamps to keep it on the table and give it strength.
 I drilled 1/4" pilot holes for the saber saw blade. One for each cut out section.
 I also made 1/8" holes along the centerline of each section, two each, so that I can easily draw the center line on subsequent module bases. This base will be a template for all the others so that I don't have to measure each one.

 This picture was to remind me to ask Santa for a new saber saw with an LED light. I really like the lights and lasers on the new equipment as it makes cutting easier.

The ice melted in my water. I need to get another one of the fancy insulated cups for the basement so the drink stays cold.

I began sawing out the cut out sections. Right away I notice that I should have made the outer and inner radii sections 2" wide instead of 1". This will be corrected on the next base.

Here is the waffle base. It doesn't weigh hardly anything, but the wood is incredibly strong. I've built two modules with waffle luan and co-built two 4x8 layouts with this technique. It is AMAZINGLY strong. To make my point we accidently rolled a 15 lb bowling ball of a table and onto a module. Didn't even make a dent. The 4x8 layout that Paul Voelker and I built was so light that you could pick up the entire layout with ONE FINGER. This stuff does not warp, is cheap and can be formed into almost anything. The drawbacks are the splinters and the time it takes to cut out and assemble.
 All of the cut areas have to be sanded. Instead of using the belt sander which throws the splinters everywhere, I just use a sanding block. It is quick and easy.
 This edge is just too thin, so I'll widen it on the drawings and the next module to 2".
 Now I'll lay the first module on the next panel and trace all the cut outs. I'll make adjustments for the 2" outer radii and then cut it out.
 Here is module 2 with the wider outer radii. This is MUCH stronger and will give me more room to glue support blocks to the outer panel.

Here are the two module bases laying on the shop floor. You HAVE to keep these 100% flat or they will warp until you get the supports on. Damn, this is smaller than it looks. The center operating pit was designed to be 3' wide, but it looks awfully small for my fat frame. Looks like the layout height will be taller than I thought so that I can get in.
I'm headed out to eat turkey, but will work on it some more this weekend. Next step is to make two more bases and rip some 3.5" supports.
WARNING: Luan generates splinters that are painful and can cause infections. They are very sharp and are quite painful when they get in your eye. Do not take this lightly. Please wear safety glasses and gloves when cutting Luan.
We'll start with the cutting diagram below. Click on the diagram to enlarge.
 The original plan was to have five "wedges" instead of four. However, when I went down to the basement to plot them out I found that it was a bit more difficult to do than I first thought while drawing it on the CAD system. My brilliant wife challenged my five section thinking and asked my why I had not used four which would allow for an easier mark up. When I looked at the drawing and tested her theory, I figured that the loss of one more support in the module would not affect its strength and modified the drawings per her suggestion. Thanks honey! The new design is much easier and can be laid out without bisecting arcs or fancy geometry.
This morning I had Home Depot rip 5 sheets of 3/16" Luan for me. They are nice and square.

Naturally, the work desk is a mess and has to be cleaned up before I start. I left the panels on the floor to flatten out and I'll use my 290 lb bulk to flatten them further as I stand on them. Fat has its advantage. Usually at the all-you-can-eat restaurant. Nobody gets in my way!
 I was going to draw a lot of radii, so I figured I'd invest a little time in making a radius tool for the project. None of my other ones were over 4' in length.
 I clearly label the radius tool because it is a scrap piece of wood and will get used or thrown out if it is not clearly marked. I'll keep it by the other measuring devices in the shop.
 Instead of nails like many people use, I use a screw for the pivot point. It locks the tool in place and it won't move until you want to take it out.
 Carefully I draw all the radii on the panel using a gel pen. I couldn't find a pencil and the dark in shows up better on the Luan.
 Each radii is no on the panel. The main centerlines I go over twice so they are darker. Thought about using another pen color.
 Next I marked the 20" dimension for the section line.
 One on each side.
 Here you can see the section lines and their 1" parellel line that goes on either side. The parallel line will be used to draw the "holes".
Throughout the evening I was visited by Quality Control She used her flashlight to show my mistakes to me. Just like her mother....
 Here you can see the lines
 Once all the tangent lines were drawn, I used a roll of masking tape to draw the filets in. These filets are necessary for adding strength to the module and should not be left out. I would not use the masking tape roll again as it is a 1.5" radius. A 2" radius (now in the drawing above) is much easier to cut with a sabre saw.
 Here you can see the filets drawn in the "holes" or "cut out sections"
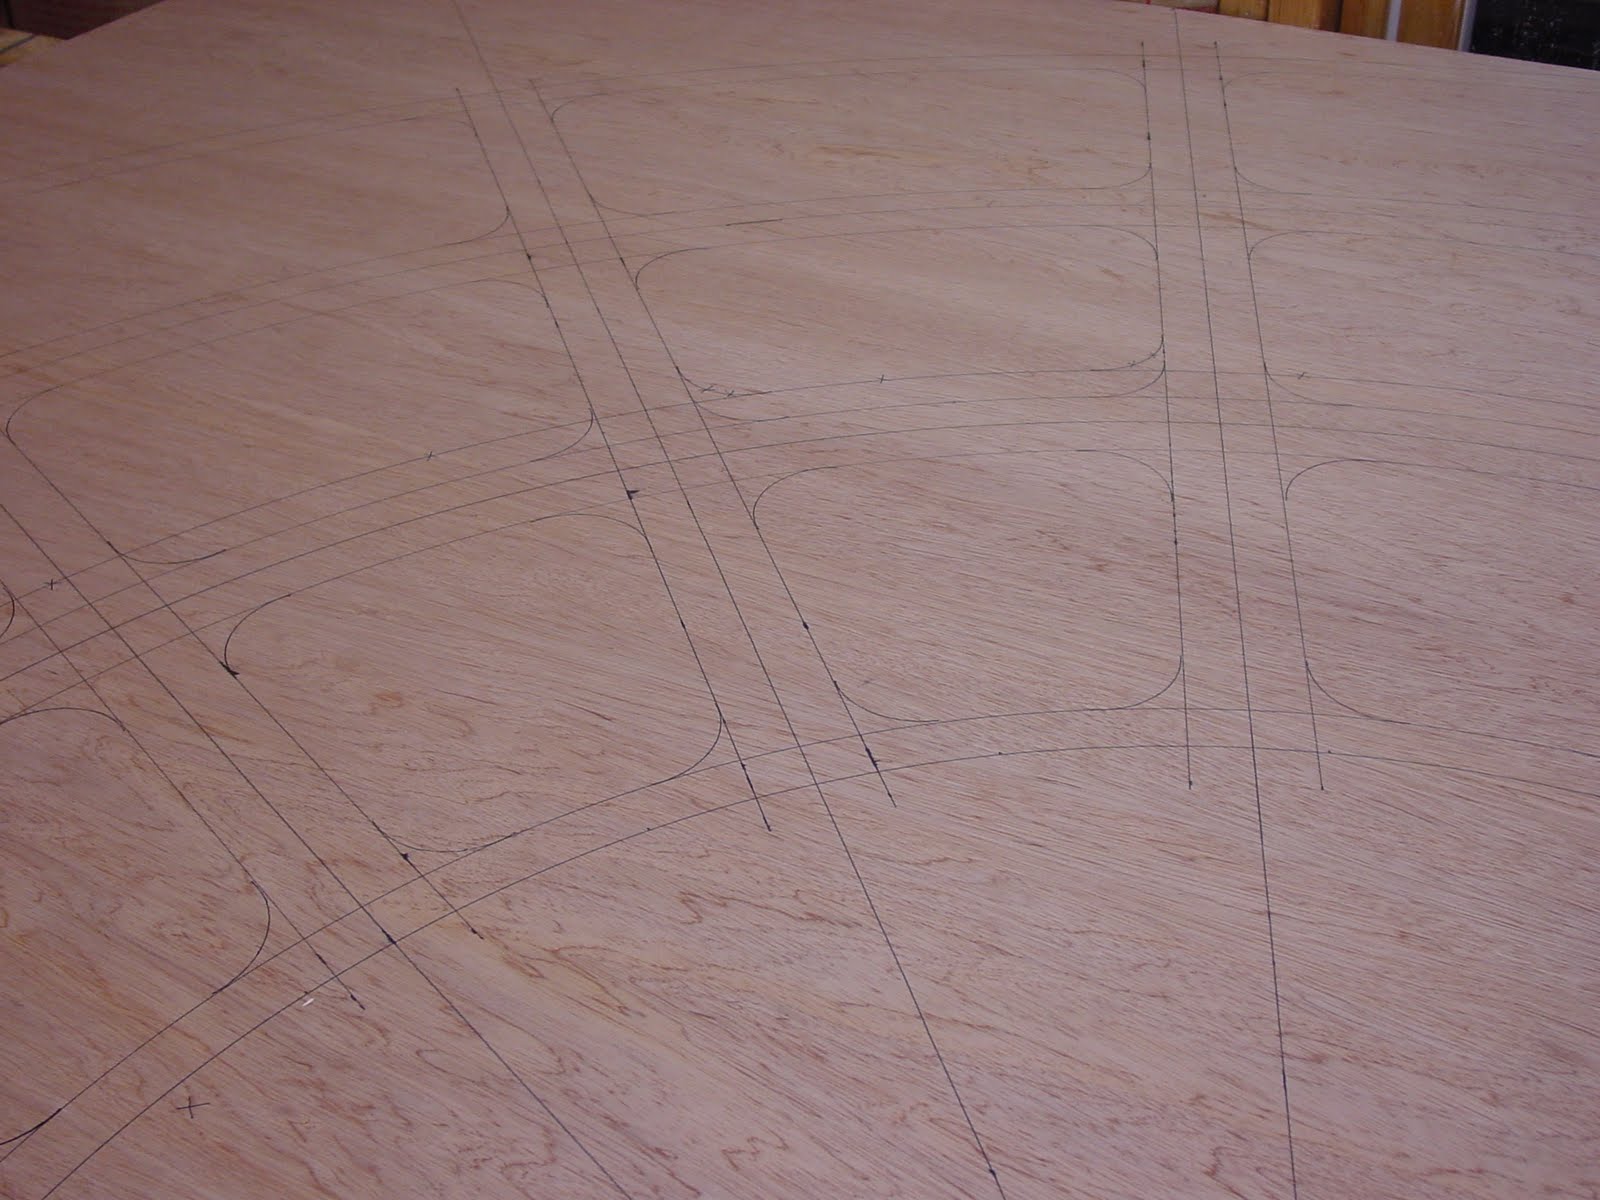 Looking good! Let's make some sawdust. Safety glasses, everyone!
 The panel is larger than the work table and quite flimsy. I will use a variety of clamps to keep it on the table and give it strength.
 I drilled 1/4" pilot holes for the saber saw blade. One for each cut out section.
 I also made 1/8" holes along the centerline of each section, two each, so that I can easily draw the center line on subsequent module bases. This base will be a template for all the others so that I don't have to measure each one.
 This picture was to remind me to ask Santa for a new saber saw with an LED light. I really like the lights and lasers on the new equipment as it makes cutting easier.
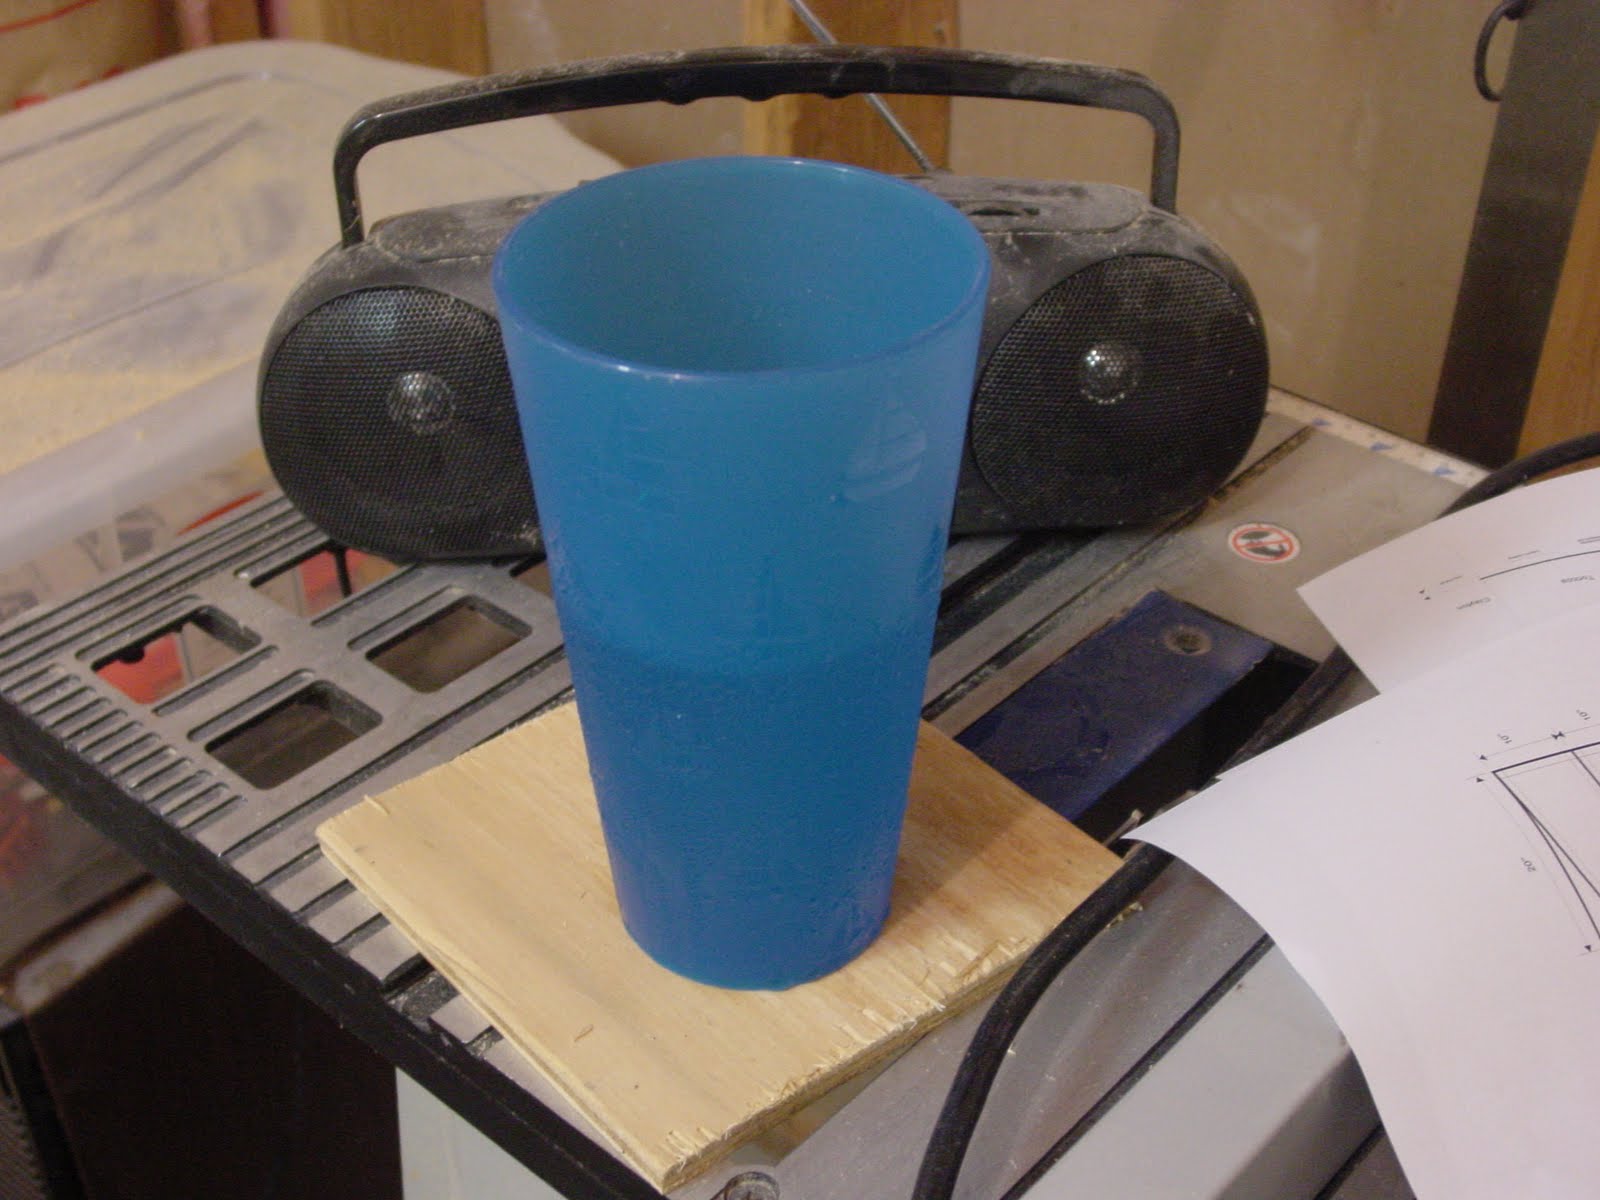
The ice melted in my water. I need to get another one of the fancy insulated cups for the basement so the drink stays cold.

I began sawing out the cut out sections. Right away I notice that I should have made the outer and inner radii sections 2" wide instead of 1". This will be corrected on the next base.

Here is the waffle base. It doesn't weigh hardly anything, but the wood is incredibly strong. I've built two modules with waffle luan and co-built two 4x8 layouts with this technique. It is AMAZINGLY strong. To make my point we accidently rolled a 15 lb bowling ball of a table and onto a module. Didn't even make a dent. The 4x8 layout that Paul Voelker and I built was so light that you could pick up the entire layout with ONE FINGER. This stuff does not warp, is cheap and can be formed into almost anything. The drawbacks are the splinters and the time it takes to cut out and assemble.
 All of the cut areas have to be sanded. Instead of using the belt sander which throws the splinters everywhere, I just use a sanding block. It is quick and easy.
 This edge is just too thin, so I'll widen it on the drawings and the next module to 2".
 Now I'll lay the first module on the next panel and trace all the cut outs. I'll make adjustments for the 2" outer radii and then cut it out.
 Here is module 2 with the wider outer radii. This is MUCH stronger and will give me more room to glue support blocks to the outer panel.
Here are the two module bases laying on the shop floor. You HAVE to keep these 100% flat or they will warp until you get the supports on. Damn, this is smaller than it looks. The center operating pit was designed to be 3' wide, but it looks awfully small for my fat frame. Looks like the layout height will be taller than I thought so that I can get in.
I'm headed out to eat turkey, but will work on it some more this weekend. Next step is to make two more bases and rip some 3.5" supports.
Subscribe to:
Posts (Atom)


