I got some more Aged Driftwood, so I put it away.
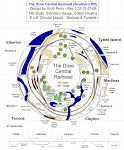
Last night at the auction I both this older baggage car for $5. Thought I might modify it for something on the Dixie. Its in HO.
This L&N single sheathed car is very nice. I'm a sucker for L&N. $6 is not bad.
Actually I don't understand why more people don't attend the auction. The deals are steals.
A Monon gondola. Another favorite railroad of mine, and for $5 it is worth it.
I also bought a huge pack of wheels and coupler parts for $5. There isn't a drawer for these, so I'll make one. In the grab bag of parts was a full set of ribbed back wheels from NWSL. Nice!
Using the labeler I labeled the drawers. The toy is my daughters and is in for repair.
My camer lens is dirty so I better clean it before I start.
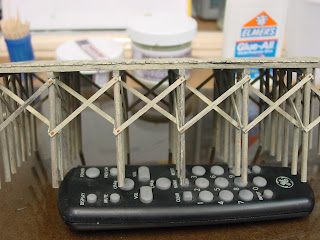
First chore tonight is to work on the piling that is too far apart. I'll just reinforce it. This will give it something to break up the long symmetrical wall.
There. The addition of some more pilings made it look better and it appears to be reinforced.
Next we'll keep working down the wall where we left off.
When Richard was over he did notice that I build things in sub assemblies. Actually I didn't think that this was so special as I've always done it. But he pointed out that many people don't do this normally. So, if you don't build things in sub assemblies here is why I do it that way.
Mainly it is easier to build things in small pieces. This model is over three feet long and barely fits on most modeler's workbenches. Normally I keep a one foot rule. The subassembly must fit in a one foot square area. This makes it easy to handle and to turn around. Secondly I do it because if Imake a mistake, I just start over on the sub assembly and don't have to rebuild the whole model.
This goes very quickly now that I've got the rythym down. Repetitive tasks develop a rythym and its bad to stop when you have tempo.
Here are the pier walls and piers. Looking good!
Richard and I talked about nut-bolt-washer (nbw) castings on the pier. Yes, they do have them. No, I'm not going to put over 500 nbw castings on this model. It's not for a championship contest, it is for a layout. A good friend and legendary modeler Allen McClelland has a philosphy of "good enough" modeling. It is where you do just enough to make it acceptable. Now, if this was to be an NMRA contest project, I would and can add all those nbw's. But for this model I just need to hint that they are there.
The shocker! I'm going to paint them on.
First of all, I'm only going to paint the nbw's that would show to the viewer. The others will be ignored. We'll do this with rust colored paint and a toothpick.
There are lots of colors to use but I'm going to try RUST and OXIDE RED.
Using a scrap piece of stained wood I try a drop of each. The RUST looks the best, so we'll go with that.
The paint is old and has separated. No problem! We'll just put the bottle on the mixer. This handy lab mixer uses a controllable rotating magnet to stir the bottle.
I place a small steel screw in the bottle and stir the tough pigment in the bottle with a toothpick. Once the screw moves freely I put it on the lab mixer and crank up the magnet.
A few minutes later the paint is thorughly mixed and I didn't have to shake it. This device is priceless. It also is a controllable hot plate and good for many things in the shop.
Here I have painted on the nbw's. They look great from a distance. Let's see how many judges really notice!
Have a great evening!


No comments:
Post a Comment