You can now subscribe to this blog via email....which I think is easier. Take a look to your right to sign up.
Sunday, January 31, 2010
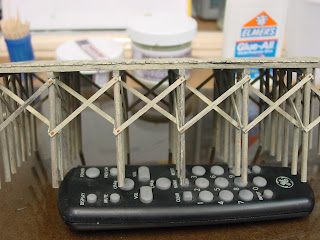
#017 04 Tybee Pier - Momma Don't Take My Kodachrome Away
My daughter will never know what that song is about... shame.
I printed out a bunch of photos of piers today and put them in a binder. This binder will go to the shop with me as I start adding the details. This will include mussels, seawater darkening, salt rings, moss and other nifty details.
The internet is so valuable for photos. I find that if I print them out and put them in a book, it is easy for me to refer to them. This also comes in handy for validating my model to the NMRA judges.
It won't be long before the pier is done and I'll write it up for the NMRA contest and have the NCIOG guys pre-judge it for me. Then I'll make corrections and take it to Alabama...baby willing.
Saturday, January 30, 2010
Long Legged Module and Rolling Stock Assembly
Today has been an on and off day. Work a little, play trains a little. Rainy, cold, nasty day.

The leg has to go. It's just not stable enough. Bob suggested I go with a double leg, and we'll do that today. But last night I had a dream...

Every railroad needs a foreman. Safety glasses, check. Warm coat for the cold basement, check. Lollipop rink, big check. We're ready to go!

My dream was that the temporary set up leg would also be the carrier of the plastic section legs. Brilliant! I have the best nightmares.

First we'll take some plywood strips and make an L-girder.

Taylor wanted to know why the clock doesn't work. Now that she and the other 14 emails I've gotten about the clock have pissed me off, I sent her upstairs for a AA battery. Meanwhile I'll knock the dust off.

There! It's ticking. Now are you happy?

I marked each of the leg board at 44". This may be a bit long, but I'll adjust it later.

I'm out of 1 1/4" screws again. You have to remember to get some, Scott. Ask the guys if they want to all go in on a pail.

Using glue and 1 1/4" drywall screws I've made to 44" long l-girders for legs.

I'll make two 12" long 2x2's and use them for the spacers.

Then I cut some 3" long 2x2 pieces for the adjustable feet.

Using scrap plywood I built a small tray to hold the bottom part of the plastic pipe leg extensions.

I finished the bottom tray and built a top tray, leaving one side off. I'll get some bungy cord and use it to hold the legs tightly in place. After digging through the hardware box I was unable to find a cheap handle, so I'll pick up one and add it later.

There! Now I have a more sturdy leg set with a built in leg extenison carrier! This kind of thinking is important in portable layout design.

The leg is just a bit longer than I'd like, so I'll cut another inch off the bottom and remount the adjustable feet.

Now that the first section is so much more stable than it was, I mounted the second section to the first and will get it ready to add foam and risers. Keep in mind that we still need to put in the scenic dividers, but I want the risers in first.
 I kept wondering why my clamps were always fastened so tightly to the bench. Normally I leave them loose so that I can grab them quickly. Then I caught this photo of
 Cinderella tightening them up. Oh well. Having a four year old running around is tough work.

The web on the sections doesn't allow for easy clamping, so I'll cut some 2" x 2" plywood clamping blocks and glue them in place.

Taylor (4 years old) is a great painter so I put some acrylic orange paint in an old ashtray (glass) and got her to paint the tops of the clamping pads orange. She does amazingly well. The Cinderalla dress is a bit over the top, though.

Painting with the grain helps the paint flow. Keep your brush full but not overloaded is the key to smooth strokes. These unimportant pieces are very good learning tools. There are 14 of them and the repetive nature of the task teaches patience and allows for the skill to develop. I'm talking to GROWN UPS here!

14 clamp pads. The bright orange is a tip I picked up from Bob Wheeler who sprays his joints and clamping points bright orange so that you can see them easily under the layout.

Now that I have the wheelsets its time to start working on the rolling stock. We'll start with the locomotive and electronics work station, a foam cradle and the Monon gondola.

When you open up a kit the first thing you do is check the parts to make sure that everything is there and in good shape. Unfold the instructions and READ THEM. Hey you....(smack). READ THE INSTRUCTIONS. You'll be suprised how much you learn about model building. This kit is complete and it has a very nasty frame casting that is full of flash (extra metal from the casting process) that must be filed away.

After a great deal of filing I got the casting to fit in the well of the car casting. Still, there is a lot flash left. I spent an extra amount of time making sure the coupler pockets were clean and free of metal, and that the bolsters (where the trucks go) were smooth and polished. I'm too worried about the rest as you won't see it on the layout. We'll put it aside for painting.

I swapped out the plastic tired wheelsets for Kadee metal 33" wheels. They will need a coat of paint as will some of the detail parts in the kit. I'll take them upstairs tonight and wash them in Greenworks Dish Detergent. I use this product because it is all natural, easy on the plastic and dries clean. Dawn dishwashing detergent pulls vital oils out of the plastic. Besides it is always better to use all natural products when you can.

The truck sideframes had some flash so I removed it with a hobby knife. There was a sprue gate on the gondoal that I removed with a hobby knife and a sanding block. There! All ready to paint. I'll dig through the models and get two more that require black paint and do them all at once.
That's all for today!

The leg has to go. It's just not stable enough. Bob suggested I go with a double leg, and we'll do that today. But last night I had a dream...

Every railroad needs a foreman. Safety glasses, check. Warm coat for the cold basement, check. Lollipop rink, big check. We're ready to go!

My dream was that the temporary set up leg would also be the carrier of the plastic section legs. Brilliant! I have the best nightmares.

First we'll take some plywood strips and make an L-girder.

Taylor wanted to know why the clock doesn't work. Now that she and the other 14 emails I've gotten about the clock have pissed me off, I sent her upstairs for a AA battery. Meanwhile I'll knock the dust off.

There! It's ticking. Now are you happy?

I marked each of the leg board at 44". This may be a bit long, but I'll adjust it later.

I'm out of 1 1/4" screws again. You have to remember to get some, Scott. Ask the guys if they want to all go in on a pail.

Using glue and 1 1/4" drywall screws I've made to 44" long l-girders for legs.

I'll make two 12" long 2x2's and use them for the spacers.

Then I cut some 3" long 2x2 pieces for the adjustable feet.

Using scrap plywood I built a small tray to hold the bottom part of the plastic pipe leg extensions.

I finished the bottom tray and built a top tray, leaving one side off. I'll get some bungy cord and use it to hold the legs tightly in place. After digging through the hardware box I was unable to find a cheap handle, so I'll pick up one and add it later.

There! Now I have a more sturdy leg set with a built in leg extenison carrier! This kind of thinking is important in portable layout design.

The leg is just a bit longer than I'd like, so I'll cut another inch off the bottom and remount the adjustable feet.

Now that the first section is so much more stable than it was, I mounted the second section to the first and will get it ready to add foam and risers. Keep in mind that we still need to put in the scenic dividers, but I want the risers in first.


The web on the sections doesn't allow for easy clamping, so I'll cut some 2" x 2" plywood clamping blocks and glue them in place.

Taylor (4 years old) is a great painter so I put some acrylic orange paint in an old ashtray (glass) and got her to paint the tops of the clamping pads orange. She does amazingly well. The Cinderalla dress is a bit over the top, though.

Painting with the grain helps the paint flow. Keep your brush full but not overloaded is the key to smooth strokes. These unimportant pieces are very good learning tools. There are 14 of them and the repetive nature of the task teaches patience and allows for the skill to develop. I'm talking to GROWN UPS here!

14 clamp pads. The bright orange is a tip I picked up from Bob Wheeler who sprays his joints and clamping points bright orange so that you can see them easily under the layout.

Now that I have the wheelsets its time to start working on the rolling stock. We'll start with the locomotive and electronics work station, a foam cradle and the Monon gondola.

When you open up a kit the first thing you do is check the parts to make sure that everything is there and in good shape. Unfold the instructions and READ THEM. Hey you....(smack). READ THE INSTRUCTIONS. You'll be suprised how much you learn about model building. This kit is complete and it has a very nasty frame casting that is full of flash (extra metal from the casting process) that must be filed away.

After a great deal of filing I got the casting to fit in the well of the car casting. Still, there is a lot flash left. I spent an extra amount of time making sure the coupler pockets were clean and free of metal, and that the bolsters (where the trucks go) were smooth and polished. I'm too worried about the rest as you won't see it on the layout. We'll put it aside for painting.

I swapped out the plastic tired wheelsets for Kadee metal 33" wheels. They will need a coat of paint as will some of the detail parts in the kit. I'll take them upstairs tonight and wash them in Greenworks Dish Detergent. I use this product because it is all natural, easy on the plastic and dries clean. Dawn dishwashing detergent pulls vital oils out of the plastic. Besides it is always better to use all natural products when you can.

The truck sideframes had some flash so I removed it with a hobby knife. There was a sprue gate on the gondoal that I removed with a hobby knife and a sanding block. There! All ready to paint. I'll dig through the models and get two more that require black paint and do them all at once.
That's all for today!
Cotton Links
Courtesy of Mr. Rhett Graves, a gentleman and a scholar...
Scott,
Here's a few links I ran across today while perusing the Mississippi Department of Archives and History website:
http://mdah.state.ms.us/arrec/digital_archives/cooper/index.php?itemno=2860
You don't have to model the steamboat details so long as you have it fully loaded with cotton!
http://mdah.state.ms.us/arrec/digital_archives/cooper/index.php?itemno=2880
I'm guessing there weren't many height restrictions along this portion of the Yazoo & Mississippi Valley RR.
Speaking of the Y&MV (which got swallowed up by the IC in 1899 on paper, but lasted until 1949 in paint), your car roster has the chance to feature some little-known railroads that eventually got swallowed up into the Southern, SAL or ACL. Here's a few that come to mind:
Georgia Southern & Florida - Southern controlled, but still independent in 1920. Though part of NS, it's still independent in paint today!
Atlanta, Birmingham & Atlantic - reorganized as the Atlanta Birmingham & Coast in 1926 (you could conceivably have both the AB&A and AB&C). Ultimately absorbed into ACL in 1946.
Macon, Dublin & Savannah - absorbed into SAL in 1958.
And being in Georgia, you've got a plethora of shortline carriers whose rolling stock would make excellent modeling fodder. Here's the complete list: http://railga.com/railhistlist.html
I notice the "Savannah, Tybee & Atlantic." Could that be your prototype?
Rhett
Wiring Diagram for the Three Way (Lap) Turnout (3-way)
I'm about ready to start building the three way (lap) turnout and was curious as to how to wire it. They are not very common in the prototype, but you can find them on layouts. I especially want to make sure that it is DCC friendly. Here are some links.
Gap cutting diagram is on the template
http://www.handlaidtrack.com/document_general_info.php?products_id=2228
Detailed DCC Friendly Wiring Diagram
http://www.wiringfordcc.com/switches_walthers.htm
Routing Power on a 3-Way
https://www.handlaidtrack.com/forums/viewtopic.php?f=4&t=844&view=previous
Gap cutting diagram is on the template
http://www.handlaidtrack.com/document_general_info.php?products_id=2228
Detailed DCC Friendly Wiring Diagram
http://www.wiringfordcc.com/switches_walthers.htm
Routing Power on a 3-Way
https://www.handlaidtrack.com/forums/viewtopic.php?f=4&t=844&view=previous
Friday, January 29, 2010
#016 04 Tybee Pier - Need a Lift?

I also bought a pile of used Railroad Model Craftsmen and a Wayne Wesolowski book to read the week after next when I'm laid up recovering from a vasectomy. What fun. I told my wife not to take it out of my train budget but to charge it against medical. Smart me!

Repair time! Time to fix the section that my daughter knocked down so that I can start laying track tomorrow.

First I mark where the foam isn't so that I don't put glue where it is not needed. The handy kerosene heater in the back knocks the chill off pretty well when the ice starts to fall.

I double check the surface for smoothness and then add a bead of glue around the web.

The guilty party is glued to the chair and not allowed to move while the repairs are done. I'm out of duct tape or we'd be using that around the always-running motor mouth. Why, why, why, why, why, daddy!

There! Glued and stable. Ok, maybe not so stable.

This area was lifting up, so I clamped her down.

I re-glued all of the uprights and will screw them in tomorrow when the glue dries.

My wife takes pictures while I repair the broken foam section that was knocked out from the fall. Daughter got loose and I panic.

I don't see her so I figure she went upstairs. I carefully glue the broken piece back in place.

Now let's test fit the pier into its home. Nice fit and it really looks good.

Not bad for an old fat guy!

We'll let the section dry and start on another project. I want to put this hoist assembly on the dock. Let's study the parts and see if it can be used. The piece was set on the pier and it fits nicely.

The base is really nice. I don't know what kit this came from but it is perfect for hauling cotton.

Before I get too far I take out the handy notebook and a handful of Sharpee pens and quickly sketch the derrick and its three cables. One rotates the boom. The other raises and lowers the boom and the third raises and lowers the hook. There are tie downs to anchor the top to keep it stable (guylines). Always make notes when you disassemble things, and don't forget to photograph it as well.

Meanwhile the Popsicle Bandit practices making models beside me. She is taking after some of the guys in the NCI group that she adores. She has glue everywhere (Bob), Popsicle sticks glued to the table (Rick) and keeps spilling stuff on the floor (Ken). At least it is not tie stain.

After careful consideration I've decided that the metal hoist operator shack has got to be replaced with a wooden one. It is just too modern and already assembled, so I'll throw it in the salvage parts box and scratchbuild one. I'm in need of a pile of Grandt Line windows and doors, so I'll add that to my shopping list for the show coming up.

The more I play with this the less I like it. It is VERY tall and a bit unruly. My guess is that every time I move the layout I'll be unscrambling cables. I'll set it aside and pray about it for a while. Maybe I'll not use it.
Wednesday, January 27, 2010
Just Back From a Road Trip
I didn't have my computer with me so not much got done over the past few nights. Mostly I was thinking about getting some trackwork down. Also, I made a Powerpoint deck of pier photos that I plan to use for detailing.
Other than that...crickets!
Other than that...crickets!
Sunday, January 24, 2010
#015 04 Tybee Pier - This is Taking Forever
Man, this pier is taking up huge amounts of time. I've got speed it up. Tonight we start making shortcuts. A friend of mine Richard visited today and since he is a very good model builder I figured I'd get some negative comments, but he didn't let me have it, so it must not be too bad.

I got some more Aged Driftwood, so I put it away.

Last night at the auction I both this older baggage car for $5. Thought I might modify it for something on the Dixie. Its in HO.


This L&N single sheathed car is very nice. I'm a sucker for L&N. $6 is not bad.

Actually I don't understand why more people don't attend the auction. The deals are steals.

A Monon gondola. Another favorite railroad of mine, and for $5 it is worth it.


I also bought a huge pack of wheels and coupler parts for $5. There isn't a drawer for these, so I'll make one. In the grab bag of parts was a full set of ribbed back wheels from NWSL. Nice!

Using the labeler I labeled the drawers. The toy is my daughters and is in for repair.

My camer lens is dirty so I better clean it before I start.

First chore tonight is to work on the piling that is too far apart. I'll just reinforce it. This will give it something to break up the long symmetrical wall.

There. The addition of some more pilings made it look better and it appears to be reinforced.

Next we'll keep working down the wall where we left off.

When Richard was over he did notice that I build things in sub assemblies. Actually I didn't think that this was so special as I've always done it. But he pointed out that many people don't do this normally. So, if you don't build things in sub assemblies here is why I do it that way.
Mainly it is easier to build things in small pieces. This model is over three feet long and barely fits on most modeler's workbenches. Normally I keep a one foot rule. The subassembly must fit in a one foot square area. This makes it easy to handle and to turn around. Secondly I do it because if Imake a mistake, I just start over on the sub assembly and don't have to rebuild the whole model.

This goes very quickly now that I've got the rythym down. Repetitive tasks develop a rythym and its bad to stop when you have tempo.

Here are the pier walls and piers. Looking good!

Richard and I talked about nut-bolt-washer (nbw) castings on the pier. Yes, they do have them. No, I'm not going to put over 500 nbw castings on this model. It's not for a championship contest, it is for a layout. A good friend and legendary modeler Allen McClelland has a philosphy of "good enough" modeling. It is where you do just enough to make it acceptable. Now, if this was to be an NMRA contest project, I would and can add all those nbw's. But for this model I just need to hint that they are there.
The shocker! I'm going to paint them on.

First of all, I'm only going to paint the nbw's that would show to the viewer. The others will be ignored. We'll do this with rust colored paint and a toothpick.

There are lots of colors to use but I'm going to try RUST and OXIDE RED.

Using a scrap piece of stained wood I try a drop of each. The RUST looks the best, so we'll go with that.

The paint is old and has separated. No problem! We'll just put the bottle on the mixer. This handy lab mixer uses a controllable rotating magnet to stir the bottle.

I place a small steel screw in the bottle and stir the tough pigment in the bottle with a toothpick. Once the screw moves freely I put it on the lab mixer and crank up the magnet.

A few minutes later the paint is thorughly mixed and I didn't have to shake it. This device is priceless. It also is a controllable hot plate and good for many things in the shop.
Here I have painted on the nbw's. They look great from a distance. Let's see how many judges really notice!
Have a great evening!
First we need to do some chores...

I got some more Aged Driftwood, so I put it away.

Last night at the auction I both this older baggage car for $5. Thought I might modify it for something on the Dixie. Its in HO.


This L&N single sheathed car is very nice. I'm a sucker for L&N. $6 is not bad.

Actually I don't understand why more people don't attend the auction. The deals are steals.

A Monon gondola. Another favorite railroad of mine, and for $5 it is worth it.


I also bought a huge pack of wheels and coupler parts for $5. There isn't a drawer for these, so I'll make one. In the grab bag of parts was a full set of ribbed back wheels from NWSL. Nice!

Using the labeler I labeled the drawers. The toy is my daughters and is in for repair.

My camer lens is dirty so I better clean it before I start.

First chore tonight is to work on the piling that is too far apart. I'll just reinforce it. This will give it something to break up the long symmetrical wall.

There. The addition of some more pilings made it look better and it appears to be reinforced.

Next we'll keep working down the wall where we left off.

When Richard was over he did notice that I build things in sub assemblies. Actually I didn't think that this was so special as I've always done it. But he pointed out that many people don't do this normally. So, if you don't build things in sub assemblies here is why I do it that way.
Mainly it is easier to build things in small pieces. This model is over three feet long and barely fits on most modeler's workbenches. Normally I keep a one foot rule. The subassembly must fit in a one foot square area. This makes it easy to handle and to turn around. Secondly I do it because if Imake a mistake, I just start over on the sub assembly and don't have to rebuild the whole model.

This goes very quickly now that I've got the rythym down. Repetitive tasks develop a rythym and its bad to stop when you have tempo.

Here are the pier walls and piers. Looking good!

Richard and I talked about nut-bolt-washer (nbw) castings on the pier. Yes, they do have them. No, I'm not going to put over 500 nbw castings on this model. It's not for a championship contest, it is for a layout. A good friend and legendary modeler Allen McClelland has a philosphy of "good enough" modeling. It is where you do just enough to make it acceptable. Now, if this was to be an NMRA contest project, I would and can add all those nbw's. But for this model I just need to hint that they are there.
The shocker! I'm going to paint them on.

First of all, I'm only going to paint the nbw's that would show to the viewer. The others will be ignored. We'll do this with rust colored paint and a toothpick.

There are lots of colors to use but I'm going to try RUST and OXIDE RED.

Using a scrap piece of stained wood I try a drop of each. The RUST looks the best, so we'll go with that.

The paint is old and has separated. No problem! We'll just put the bottle on the mixer. This handy lab mixer uses a controllable rotating magnet to stir the bottle.

I place a small steel screw in the bottle and stir the tough pigment in the bottle with a toothpick. Once the screw moves freely I put it on the lab mixer and crank up the magnet.

A few minutes later the paint is thorughly mixed and I didn't have to shake it. This device is priceless. It also is a controllable hot plate and good for many things in the shop.

Here I have painted on the nbw's. They look great from a distance. Let's see how many judges really notice!
Have a great evening!
Subscribe to:
Comments (Atom)


