Well, that should tell you how my afternoon went today in the shop! After about an hour's worth of work building a jig for making pier bents I realized that the drawing (which I did check vertically) was not correct horizontally. I will redo it tonight. Everything was right but the piling dimensions. The pilings must fall under the rail or it won't hold the heavy rolling stock. Crap.
And now...blog o mania.
My wife bought these really nice 1 oz stainless steel condiment cups. I use them for painting because the are easy to clean and heavy so you don't knock them over.
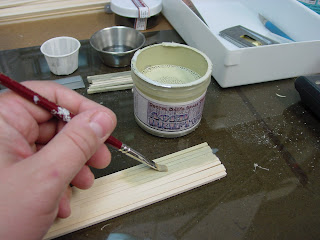
Here is the lumber that I ordered from Trainmaster Models in Buford, GA, USA.
Today I went to the Train Show at the North Atlanta Dump...er North Atlanta Trade Center. They should trade it in on a new building. There was a ton of used equipment and since we're still on the Bleach Budget for the rest of the month, I'm paying in cash. Here is a spiffy Georgia Railroad boxcar. That makes one too many boxcars, but I can swap one out.
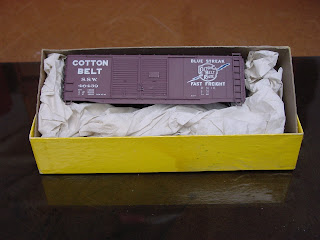
You have to have something that says Cotton on it, so I'll add this double door Cotton Belt boxcar. Ok, now I'm two boxcars over the limit. I never did find a shorty combine.
Wow! A Southern caboose. It is probably about as prototype as a Steisel (steam or diesel locomotive) but it is of the type that I'd like for the railroad and better than the bobber. With new couplers and wheels, and a good coat of weathering this one will be excellent.
Back to the Pier. Let's continue working on the Pier Wall. Its about 1:00 pm so if I can get all the wood painted/stained in an hour it will be dry for later tonight. I'll do 10 strips at a time.
Before starting, always check your timber for accuracy. I'll check five spots on two sides of the board to ensure that it is 1/8" all the way down. I don't care about the length so much. Also we'll check a few for knots and weak spots. Buying in bulk gives you much better wood than that which has sat in the hobby shop for a year standing on its end and warping.
I check the wood for warpage, too. This wood is super nice and sanded to perfection.
I stack the 10 pieces close together so they support each other....
...and then I distress them with three passes of the saw blade. I change my angle on the saw, and the pressure that I put down so that the scoring doesn't look uniform. Believe me, it WILL show up in a photo and looks like a Ruffle's Potato Chip.
We will give the boards a lite sanding, about three passes.
A light coat of Dr. Ben's Aged Driftwood Weathering Stain. Keep it light or the wood will warp. Don't paint it, stain it. If you miss a spot it will be ok as we'll give the whole pier a coat of blackening solution.
Then we'll darken and age the wood with Dr. Ben's Weathered Black Paint Pigments and a little alcohol. Again, don't paint it. Sloppy is good here and precision is not what we are after. Dark spots here and there are great and a few non-covered spots will help.
Here you can see me feathering out the black using as little alcohol as possible. Alcohol = warpage, just like in college.
While it looks like a spot here, once the boards are mixed up and 50% are turned around, the spotting will look natural.
I'll take the boards and make sure to separate them as they tend to get painted together. We'll sit these under a sheet of glass to dry and prevent warpage.
When my desk top glass gets too much paint on it, I'll scrap it off with this hand scraper. We're out of razor blades again, btw.
After we finish 24 more boards on one side, we need some cap boards to go on top of the pier. They need color on three sides so we'll take three more sticks and weather them.
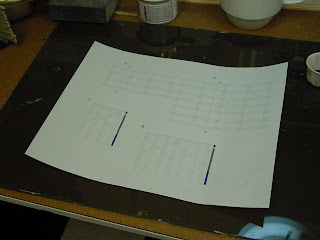
I printed off the drawing of the pier and the bents and checked them for accuracy with a rule. First, we'll make the large bent where the track goes.
I'll make a jig to produce the 7 long bents. Use a jig when you have to make several of the same pieces and especially when they need to be fairly precise. Usually it doesn't take that long and the results are worth it.
** One thing to note. The pilings on the bents are NOT UNIFORM in spacing. The rail on the trackage has to be over a piling, so there will be a facing direction on the bents. Be sure to check the assembly for gluing.
Using a sheet of .080 styrene and a pack of 1/16 x 1/8 styrene strips we'll build the jig.
The first step is to change the blade in your hobby knife. Get in the habit of this!
Using my drawing I cut off part of the thick sheet of styrene which I'll used for the base of the jig.
Be sure to keep the plastic bag and put the styrene in a flat storage box. This will protect your investment. I've got TONS of strips and keep them in this box in the shop.
Using the straight edge I cut out the long bent. We'll use this as the template on the jig.
Now we'll glue the template on to the plastic base. Use VERY THIN applications of Elmer's Glue and try to avoid any bumps. It will dry quickly.
First I glue a 1/8 x 1/16 styrene strip across the top where the cap timber will go. The trick to making jigs is to keep the board straight and provide for accuracy, but plan for being able to remove the piece out of the jig. Often I've made jigs that were too tight or had braces that prevent the removal of the piece.
Using the Northwest Shortline Chopper (mine is ancient) I'll set up a cutting system to make several of the piling guides.
I ran out of blades so I'll have to use this dull one.
I cut a strip of the 1/8 x 1/16 strip and put it on either side of the pier piling. There are 14 of these.
There! Now I can mass cut the pilings and caps and assemble them quickly and accurately!
Using some 1" x 9" boards (they were S scale board left over from a project) I cut out the sway braces.
There! A nice pier piling bent. This is just a test, so I'm not going to paint it. I'll just use it to test the dimensions.
CRAP! CRAP! CRAP! CRAP! CRAP! CRAP! CRAP! CRAP! CRAP! CRAP! CRAP! CRAP! CRAP!
Well, I checked the drawing vertically, but something happened horizontally!!! The rails MUST go over the pilings, but now it is too narrow. I'll have to start over and build a new jig.
I reprinted the plans and check them for accuracy. After dinner I'll have another go at it.












Scott,
ReplyDeleteOuch! I feel for you!
Rick