I bought some weights for making sure the freight cars come up to standard. I'll put these in the tool box where I can't find them. Probably along side the other packs that I can't find.
Hot chocolate is becoming a staple in the shop. It is snowing outside and the basement has quite a chill. The shop is heated, though, so I can come in and warm up. Wish I liked coffee.
First job is to pull the nails out of the foam that were used to hold it while driving. I had to use pliers to accomplish this.
I'm using my last hot chocolate pack. Got to ask Re to get me another box. She is VERY good about that. I notice she had resupplied the coffee and creamer this week. What a sweetie!
I got out the small hot knife again. Now that I know what I'm going to do for the pier I can cut out the foam that supports the track, which will now be the pier.
I'm going to rethink it a bit now that I'm here and can measure it. Really I don't want it longer than one rail car, and make it a little wider, too.
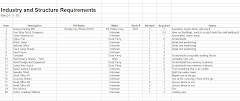
On the drymarker board I have a list going of tools and supplies that I need when I take the sectional layout to a show. I've never done this before, so if you are a member of a traveling layout team I'd love to know what you keep in your repair box! I needed to erase this, so I started a sidebar for it.
Here is the design for the pier. Usually I spend days or weeks planning something but as I've gotten to know top modelers around the country I find that they don't do nearly as much planning as I do. In fact they wing a lot of it. The pier will be 14" long, sitting in front of a retaining wall that runs the length of the ocean section. The rail car siding is on a 9" x 4" section, and the office building is on a smaller 2" x 5" section. I sketched this in about 2 minutes.
Edited: This drawing was added later showing the exact dimensions and the positioning of the track and the office.
I'm going to try Tom Thorpe's foam cutting idea using this very clean spackle knife.
Dang! I've got $100's of dollars worth of foam cutters and this $2.50 blade cuts better than any of them! It is still not perfect as there is a little tearing, but that will probably disappear as I get more skilled. There is a "touch" to using the tool. Give it a try! Thanks, Tom!
Next I need to make a template for cutting the pier base. The base will be used to construct the pier on and will also support the "water". Since friends help me in the basement from time to time I never know the condition of my utility knives so I always check the blade. For cardboard you need a very sharp blade so I'll take a minute and CAREFULLY change it out. There are two reasons that Walmart doesn't allow employees to use these knives and that is because they are very sharp and dangerous.
Using the cut out foam for the pier area I make a cardboard template. All I do is just draw around the foam with a Sharpee.
There! Now I'll cut it out with the utility knife. I just added the utility knife to the tools list on the side bar. Wow! Look at all the tools and I haven't even started any real modeling yet! I love the guys that say they can build a brass locomotive with a file and a saw. Horse hockey!
I am only going to cut the foam side (pier back wall) first. Then I'll mount the template and draw the radius underneath as the template will be a little smaller due to the inaccuracy of foam cutting.
The test fit is good. There are a few spots where the foam is uneven and makes the template poke out, but that is ok. We'll fix that later.
I drew the radius on the template and now will finish the cutting.
The test fit is good. I wanted it just a tad larger than the space.
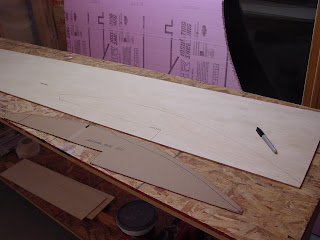
Now, using the fitted cardboard template I'll trace the shape onto a sheet of 1/4" Sandply that was left over.
Looks like an old balsa wood airplane wing stringer.
I cut the pier base out with a jig saw and will sand it down with a sanding block.
The test fit is close. There are three points of foam that need to be removed, so I'll get them with the hot knfie.
Now I want a back board that will support the retaining wall. I measure several points on the back wall and they all show 2 3/4".
I cut two strips 2 3/4" wide and about 3 feet long from the 1/4" Sandply. This will be the back board stock.
I carefully measure and cut each of the backboard pieces and prepare to glue them upright and at a 90 degree angle.
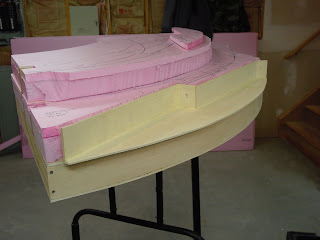
Here is the final assembly. It is on a wood block because some glue ran down the back of the assembly. I'll use this to glue the wood supports of the retaining wall directly to the back board surface. The water will also have a nice, flat surface. My goal is to do ALL water scenes off of the layout where they can be better handled. All further work will be done in the shop and the completed scene will be installed on the layout later. This also keeps the delicate water surface from being damaged or getting dirty.
Here is a close up of the corner. The pier will sit in the notch.
Ok, I can't wait for it to dry. I've just got to see it in place. Excellent! It is quite large and will be a nice focal point for this section. The gap in the back is because I didn't push it all the way in since it is still drying.
Just right! That is all for tonight. Got to get some sleep. Join me Saturday as we begin to build the retaining wall. I will shoot this section with a light coat of black paint before then.
Good night!


Great post--I love to watch something like this come together with step-by-step photos. Posts like this have been a GREAT help to my modeling skills and I try to post similarly on my blog to healp others as well. Looking forward to watching this layout come along!
ReplyDeleteYou have my promise to post my mistakes as well. One thing I have against the model railroad press is that they show only the happy, perfect completed product. Model railroading isn't about the end item, its about the path or process. So I'm posting every step including good ups like the Harbor Freight hot knife, screwing the legs on instead of bolting, not cleaning the leg extensions before painting them and many many others. That way, we all learn! Thanks for reading!
ReplyDelete