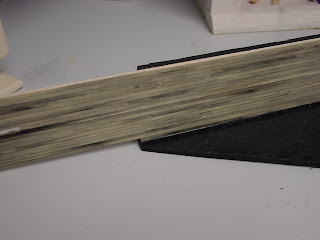
First I need to trim the length off of the back wall.
I'll turn the model around and take a large Zona saw to it.
Zona saws are VERY sharp and it makes quick work of the sawing job.
A quick hit with the 3M Sanding Sponge and it's nice and level. Why did this go more quickly and easily than the other side? Simple! I didn't put too much glue on the boards when I was mounting them this time.
Using an HO rule, I marked off 5 foot indicators to help me position the posts.
After setting the fence I began to cut the post out of stained 1/8" wood dowels. There are only three left, so I'll probably have to make some more. I got 11 cuts out of this one...so I'll need 5 more to make 70 and have some spare guard posts.
I cut up the three stained dowels and put them in the cup.
All together there are about 30, so I need 40 more and about 10 guard posts.
I've tried distressing and painting these en masse, but it is just not working. So I put in a new video tape and did them one at a time the proper way.
Each one is scored all around with an old saw blade, and then lightly sanded with a sanding sponge.
After scoring and sanding, I put on a coat of Dr. Ben's Aged Driftwood Stain on all sides, doing one stick at a time and setting it aside to dry (the stain dries very fast.)
Then using the Dr. Ben's Weathered Black Pigment and some alcohol I weathered each of the sticks, going from light to dark shades and being rather sloppy about it.
After painting and staining I use my handy scraper and a fresh single edge razor blade (I finally got to home depot) and scraped up the waste from the glass surface. Now I have a fresh, new surface!
Tape over. Time for some Virginia & Ohio with Allen McLelland.
All the posts have been stained and cut. Now I fish out any bad ones (two of them have red dye on the tops which is use to indicate size) and throw them away.
No more bulk sanding. I sanded each and every one of them on both ends.
Nicely sanded...but nice and bright! Got to dull it down a bit.
Using some of the black weathering I gave them a coat of darkness.
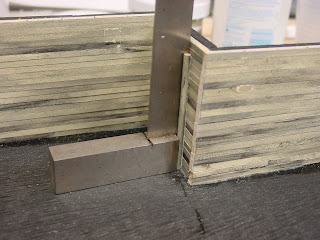
Using my right angle with a heavy base I start mounting the poles. The first three will be shorter because I don't want them to interfere with the trackage.
Using the angle and some white glue I carefully position the post and check it for straightness.
Not bad. A little too much glue perhaps, but you won't see these. Always work in the least visible area when you start something that way if you screw it up, its no big deal.
Now we'll start working our way down the wall. I switched to a flatter angle and got rid of the one with the heavy base as the base was in the way. I put three posts in the corner. The dark black one is to stop your eye from looking past it when viewing the model.
I need to replace another of my lights as it has turned yellow, too. Here is a length of the wall.
The long wall is done! I still need to put the caps on it and will have to wait until it all dries. Looking at the photo it looks like one of the posts moved out of place, so I'll fix it. Cameras are handy tools!
I'm done for the day. Off to the auction. This thing is over three feet long, so it will take some time.


No comments:
Post a Comment