I took the clamps off the Section Three repair job. It looks much better but is still not optimal. I'll be more carefull sawing next time.
The legs are all painted flat black now! Before you paint your legs be sure to clean the pipe. It has extruding compounds on it and causes the paint not to stick.
After painting I removed the tape protecting the foot from paint and made sure they turned.
Section Three is ready for landscape!
I put the foam sheets one and two back in place and anchored them with ROUND toothpicks. Roundies are hard to find, but the square cut toothpicks will break if you try to remove them. This is a temporary step to keep the layers from sliding while I mark them.
Time to get out the tool tray! I love my tool tray! This came from a Christmas sale at Pep Boys and is for autom mechanics. I bought all they had and got some to our NCI group members. We all love them! They adjust high enough that they come right up to the table top. Mostly I use it for track laying tools, but I'm using it for lots of things now.
The rolling base travels smoothly and the wide/long frame keeps it steady.
The adjustable shaft will make it chair high or 48" table top high.
I bolted a block of wood and made a holder for the power strip and the arm light. I also keep a bright orange tray for small tools and parts, along with the tool holder's trays.
The arm light (with a real lightbulb, not a CFL) is easy to position over my workspace on the layout. This is the ultimate set up for track laying on the layout.
On of my cordless drills is missing! Where did I put it?
I put a screw in the side of the tray to hold my clip board.
Ok, now down to some real work. I started marking the foam for track postioning. The first thing I drew was a center radial. This turned out to be useless, so don't bother doing it.
Next I marked the lower level track where it exits the section. I also noted the elevation.
On the right side I measured and marked the other track position for the lower level and its elevation.
Then, using my drawing, I marked the horizontal and vertical one foot lines that correspond to the drawing. This was much more helpful than measuring from the radial, but still not perfect.
On concrete your feet can develop whole new levels of aches and pains. I take the time to put down these foam floor mats to make my feet less grouchy. You can really feel the difference, especially today when the floor is very cold.
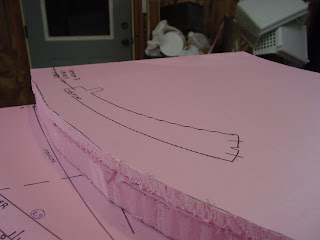
Using a 1.5" thick piece of 8' luan plywood (which bends nicely) I pushed in two 12 penny nails and used the luan to make a nice gentle curve with a Sharpee pen.
In my shop I keep some spare turnouts, so I borrowed an Atlas #6 to see how it would look instead of the #5 turnout that I had designed here. I'm going back to the #5.
The greatest thing for drawing on the foam is a collection of colored Sharpee pens! They are cheap during back to schools sales, so buy a couple of sets.
Drawing in the pier is critical at this stage because I want to make sure that I don't glue this piece down to the section top. It must be removable.
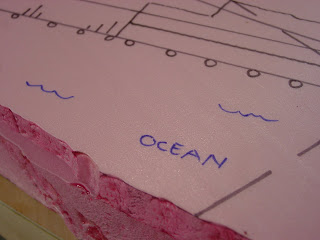
I also penned in the ocean scene. This is too steep and I don't like it, so it may not stay.
I use blue to mark bodies of water.
Well, maybe I will keep it and put some sharp jagged breaker rocks in to support the trackwork. It is still too narrow and may not look natural.
I'm careful to always identify my lines. Demarkation lines (like for feet and inches) are always dashed. The mainline is solid black and always marked as "mainline".
After the mainline and siding trackage is drawn, using a purple pen (I always do elevations in purple, even on my CAD drawings) I put the elevation on the track plan and circle it.
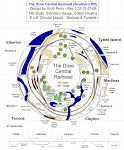
Ok, I'm still not satified with how I am measuring. So I went back to the computer and reset the drawing to give me 12" lines in green and then added 1" lines in dark grey. Now I can count and reference each square inch. Much better! I went ahead and did all for sections and printed them.
Be sure to mark each layer as I have here. The section number, layer number and a reference to which way on the section it goes. If you don't do this, you will mix them up or somebody in your shop will use it for something else.
Time to cut layer three which supports the upper track. I'm using the 2" leftover from layer one.
Using the Harbor Freight hot knife I cut out layer three and stack it on layers one and two. Nice! My cake is getting thicker!
It is cold today in Georgia. About 30 degrees and dropping outside. While my friends in Chicago will laugh at me, I'm freezing. I have the heat on (small kerosene heater) which I seldom have to use except when the temps get into the 20's. It does a good job of knocking the chill off. This big cup of hot chocolate from my shop's coffee maker works well, too. Is that peppermint schnapps that I smell?
@$%@#$%@$% Harbor Freight! After cut number four the new cutter stopped working. I tried everything buy she just wouldn't go. This isn't the first thing I've had to return to them. Time to cough up the bucks and buy a big cutter.
In the shop I had a new pencil thin cutter, so I got it out of the box and used it. It's not meant for foam as thick as 2" so it took forever to cut out the section.
Back to the old tried and true serrated edge knife. It leaves a mess of pink foam pieces laying around, but is quick and very accurate. Much faster than a hot knife.
I cut the third layer larger than I needed. You have to do this because once you start shaping the scenery you will cut into the foam. Start bigger and cut it back. Its hard to add foam back.
You can get a feel now for the elevation. There will be some rock and a block retaining wall made with Dr. Ben's Baby Building Blocks along this part of the main line.
Using layer three as a template I cut out layer four in 7/8" foam.
There! All the foam is cut and fit!
Well, I thought I bought a right hand curved but actually it was a left hand curve! Great! That is what I needed. I don't want to hand lay on this section.
Marking the top section and using the curved turnout as a template I drew in the mainline, the turnout and the 10" turntable. After measuring the locomotive I forgot that you have to balance it on the turntable so it needs to be longer than I planned (9") so I increased the pit by one inch.
@#$!@#$! Measure twice. Measure twice! I thought the two tracks looked a little too close. When I went back to the drawing I realized that I had put the upper mainline in the wrong place. It is several inches to close to the lower main. Crap. Now I have to redraw it. I'm too tired for precision work, so I'll go to bed and start fresh in the morning.
Still, I love how the scene is going together! It will look and work great! These small sections are so much easier to work with than a big 4x8 block.
I hate 4x8.


Just curious...what's wrong with CFL lights?
ReplyDeleteAwesome blog and layout work, btw.
Galen
Good question...guess I should have explained my comment. First of all they start up slow and "warm up". Second the light they give is never quite brite enough for me. Third, it has a dingy yellow or dull blue cast which really throws off paint colors. I use them everywhere in the house except reading lamps, over the stove and arm lights in the shop. When laying track I have a 100 watt daylight bulb that is bright, clear and crisp. Oh, and can burn the crap out of you.
ReplyDelete