 When you click on the image to enlarge it you can see that the glue joints are solid and connecting well. Wood glue is amazingly strong!
 Actually, it is quite a beautiful piece!
 I flipped it over and the bottom, shown here, is nice and flat. Perfect! I laid the section on top of another 4' x 4' piece of luan in order to mark the top piece for cutting.
Making sure that all the edges aligned, I took a gel pen and marked the outer and inner radii.
 While marking I noticed that in a few spots the glue dripped out and bonded the luan to my MDF topped work table. These spots won't come off with a sanding sponge, so I'll hit them later with a belt sander. You might want to cover your table with paper (as I will) on the next section.
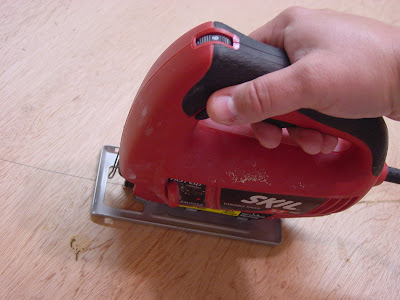
Sawing the radius is a breeze, but don't go too fast. The faster you go, the more splinters you'll generate and the more ragged the edge will be. Which means: more sanding.

After cutting, I again sanded the edges with a sanding sponge.

I test fit the section on to the top. Its a perfect fit!

Using Liquid Nails Heavy Duty tube adhesive and a caulk gun, I covered each of the slat edges with adhesive. I'm using the Liquid Nails Heavy Duty because the slats aren't precision cut and I have a lot of gaps. This adhesive fills the gaps.

Here you can see the bead of adhesive on every slat.

Here you can see the wavy cut in the slat and the light coming through the contact point. Not good. We'll have to reinforce.

Using small scrap blocks of wood and some wood glue, I reinforced each slat.

Oops! Ran out of blocks. I took the piece of corner round and using my chop saw and a deflector tunnel that I built out of scrap wood, I cut these +/- 1" pieces for reinforcing. The chop saw will throw these things at 100 mph, so be sure to have some eye protection and a deflector. If you know of a safer way to cut these, please let me know!
 The now completed module is clamped, weighted down and will be left to dry until tomorrow. Even with the imperfect slats it will be very strong and level. While the cutting is NOT forgiving, the strength of this design is strong, durable and shock resistant. It takes about two hours of total time to contruct one, but is much cheaper than plywood and much more level and durable. It also is pleasing to the eye!
Got comments? Questions? Post them below! I love to hear your ideas and critique!


Hey that is a great idea! I've helped my brother in law with his boat repair before...learned a little about it already.
ReplyDeleteThis morning I checked the section and it is very solid. Probably overkill to do any more to it.
My main goal is to get access to a better saw and all the problems go away!
Scott G. Perry, CPM
From: William Uffelman
Scott I seem to be blog ignorant. Tried to post the following comment but system wouldn't allow it:
Scott take a look at stitch and glue boat building with epoxy resin and fiberglass tape applied to joints made up with thin wire twited to tighten. You could use the resin and tape to fix your not too tight joints.
Bill Uffelman