 Section 3 is dry and ready to go!
For some reason the pest control company's products aren't killing these guys. I've got Velociraptors in my basement again.

On Section 3 I had not screwed down the waffle to the side frames, so using four 1 1/4" drywall screws per side, I countersunk and screwed them down.
 Here are sections 2 and 4. We'll be finishing them out tonight. Luckily Bob has volunteered to take pictures for me, so I'll actually be in some of them. Lucky you!
First thing is to rip the radius boards (luan on the outer radius, Masonite on the inner radius) with a table saw. I took the saw outside in the dark and tore 'em up. Unfortunately my daughter, who is four, snuck up behind me and yelled. I almost cut my hand off. This led to much yelling and the mommy getting involved. I will spend more time with my family tomorrow making sure they don't come near me when cutting wood.

I put a clamp on the edge of the table to help keep the flying end of the outer radius board from moving around too much.
 I glued and screwed the outer radius board down and then carefully glued and bent the board, fastening it in like fashion to the other side. Once it is dry I cut off the excess radius board.
Bob and I were still amazed at how heavy the modules were when they don't have the top board on them. I saw Bob get down on his hands and knees and start picking up the cutouts that littered the floor just thinking that he was helping to clean up. He then handed me a stack of them and told me that this stack came from one waffle board. It weighed several pounds! No wonder the solid tops were so heavy!
 Bob set up a little experiement since we didn't have a scale. Using a balance beam we put the cut outs on one side and the frame on the other. The waffle frame weighed a lot less than the cut outs. I made the decision that we'd cut out the TOP PLATE as well since it would have 2" of foam on it anyway. This should lighten each module by several pounds.
Here you can see the radius boards in place on Section 2. Section one was previously completed and is dry now. Amazingly strong. It has a solid top board.
 Section 3 is next. Same procedure. This time I made the board cuts the right size and they fit very well.
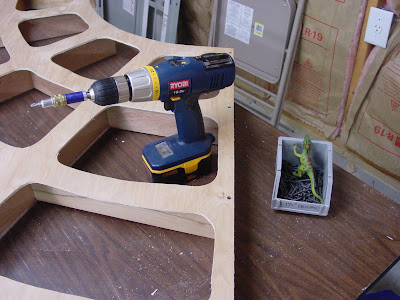
 This workbench is very high as I'm 6'2". In order to get the screw in perfectly I sat in a chair to get it to eye level. Sinking the first side is VERY important as I used plywood instead of dimensional lumber and have split a few of them. When they are split they won't interface well with the next module.
 Bob pointed out that if I had some bar clamps I could have more easily gotten the radius boards to stick to the slats. I need to buy some.

This board had a crack in it, so I just moved it down and drilled new holes.

The right board side is being mounted and the excess will be removed with a small hand saw.

I really like my workbench, but I've learned a few things that would have made it better:
- It should be mobile on locking large wheels
- The table top should extend by two inches all the way around to allow for clamping, which I often do.
- The top should be three and a half feet wide.
- Never use MDF for a table top. Use something that glue won't stick to if you can.
 The table has a two inch overhang on the front, which is handy for clamping!
The Masonite on Section Four went on smoothly and it bends very well!
 Bob showed me that if I push the radius in a bid more than normal that it will expand back into its proper place and not pull away from the slats. I bought him another cup of coffee.
Here is the bottom side of a waffle section.

Here is the inside before the new waffle top gets added.
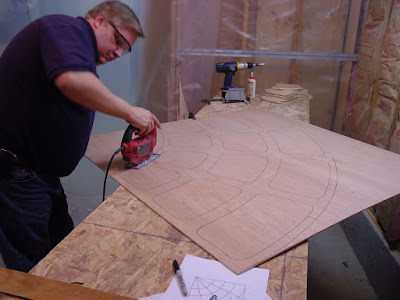
 I'm cutting the top out for section 2 and will waffle it as well in order to drop a few pounds. May just waffle myself while I'm at it.
 Bob pointed out that I was using the wrong saw blade and that if I changed to the right one I'd say "Wow!" So I changed to a smooth cut plywood blade. Wow! It worked so much better and the splinters were mostly gone! He also pointed out that I had the sabre saw on Orbital setting instead of Smooth. The saw then cut a little slower, but the cuts looked so much better! Had I known this all along I could have had a much smoother finish to the waffle.
 Cutting the waffles can get a little monotonous, but with Bob there to chat with the time went quickly. Too quickly.
 A pilot hole is being drilled (1/4") in order to start the blade.
 Using the bottom part of the section, I traced out the top sheet waffle and made sure to mark the correct side. At this point I also marked each section as 1,2,3,4 and marked its corresponding top.
So much progress!!! One thing I forgot to do is to dirll the electrical holes, so I'll do that next weekend. I'll also finish cutting and installing the top plates. Almost done with the bench.
Were are my !@#$!@$ table legs!


No comments:
Post a Comment